How to fix a dripping tap

For some, the sound of a constant dripping tap is like nails on a chalkboard.
For others, it’s an annoyance. Do you notice water collecting in your sink and you have no idea why this has started? Then it could be time to fix your leak! We help out those who are clueless about how to go about fixing this problem. We’re going to explain the steps in plain English and demonstrate how to fix a dripping tap.
A leaking tap is a blaring noise, but it could also be a big expense. The average home leaks enough cold water to fill an Olympic-sized swimming pool in about three weeks. These costing millions for the supplier.
You can save money by avoiding the hassle and fix the leak in time.
Fixing a leaking tap is something every homeowner should be able to do. This tutorial will walk you through how to fix a dripping tap. No matter if it’s been a while since you did this or you need to brush up on your knowledge.
How to fix a dripping tap with a few tools?
Before you start the work, make sure you have all your tools ready. Without the right tools, even a small job can turn into a nightmare.
To fix a dripping tap you will need an adjustable spanner and a:
- Pipe pliers.
- Adjustable spanner.
- Allen key.
- Usually Philips (cross head screwdrivers) but sometimes you need a flat head screwdriver.
- Replacement O-rings.
- Assorted washers.
- Rubber washers.
- Ceramic tap cartridges.
- Sometimes you need a reseating tool.
Advice before you start:
To find the right cartridges for your tap, first, it is better to take them out and go to the local plumbing hardware store. There will help you to choose the right cartridges and O-ring.
There are many ceramic discs (replacement cartridges) in the hardware store. The universal one will be good for you.
Doesn’t matter if you have a traditional (compression valve tap) or modern monobloc lever tap! We encourage you to change the ceramic cartridges so you don’t have to deal with leaking taps for a few years.
Quick Tips
The most important part of the job is to find the brass stop tap and turn off the water.
Always put the sink plug in the plughole. The screws are quite small and sometimes can fall into the plughole.
Never put the adjustable spanner or plier in the sink. We know that tools can easily scratch chrome taps!
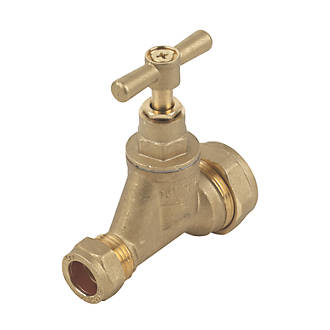
How to fix a traditional
Traditional taps are very easy o fix. We also calling compression valve taps.
1.Find the stopcock and turn off the water supply
You can find it underneath the kitchen tap. Sometimes in the airing cupboard. If you cant find the stopcock, you have to turn off the main water supply on the street.
If you are lucky you will have a small isolation valve, which can be found on the pipes underneath the kitchen sink. You can turn the valve crosswise to isolate the water.
2.Check if any water is coming out from the taps
If you can’t turn off the water don’t even carry on till you find a solution. Water pressure is high in some taps. If there be no more water flow coming out from the taps, this means is isolated and you can start the work.
3.Remove the traditional lever tap hot and cold indicator decorative cap
If you have a single lever traditional tap, unscrew the decorative cap by hand and you will find the screw underneath. Some taps have a red and blue cap, which you have to lift.
Be gentle with the screw, it can be damaged if you are overtight them. Few single lever taps screw can be easily damaged.
4.Remove the traditional tap handle
After you removed the decorative hot and cold caps, you should be able to take out the screw. The screw holds the tap head together with the valve.
If the screws are tight you can use WD-40 to help you loosen the screw. Also, remove the valve cover, turn it anticlockwise.
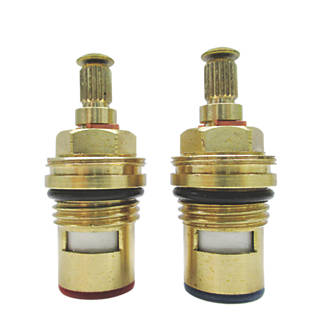
5.Remove the damaged ceramic cartridge
Release pressure by opening the tap. The cartridge is responsible to adjust the flow rate in your taps.
To remove the cartridge, you have to hold your valve steady with an adjustable spanner and loosen the cartridge anticlockwise.
Don’t panic if water will leak out from the tap body, it is normal. Get a soft cloth and clean up the leak.
Check the tap washers. If it’s worn out you can replace it and put it back. If you already bought a new cartridge replace it.
6.Check your tap seating
You have to make sure the tap seat is not damaged. You can check this with your finger or a small torch.
Sometimes the tap is dripping because the seating is damaged and not making full contact with the cartridge rubber. If the seating is damaged there is a grinder tool that you can use.
7.How to use a tap reseating tool
With the grinder tool, you can cut off from the tap so it will make a proper seal.
The tool comes with different sizes of heads. You have to find the right one and insert it on the tool. Now turn the reseating tool onto the body, and by pushing down and turning it clockwise at least 5 times, you will cut down from the body. The seating should be smooth now.
8.Replace the ceramic disc cartridge
Now that you changed the rubber washer, you can put back the new ceramic disc into the tap. You do everything inverse.
After you put the ceramic disc back, tighten the screw and test it to make sure there are no more leaks!
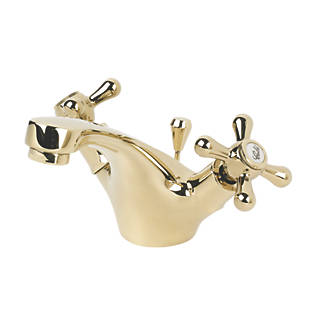
How do you fix a dripping mixer tap?
If you have modern taps (monobloc tap) your job is even easier.
First, you have to isolate the water so you can safely carry out the work without any major leaks.
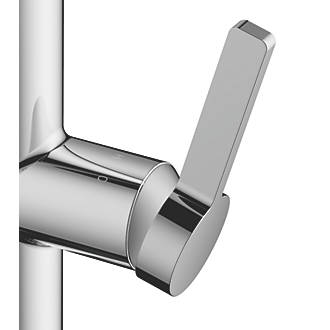
The next step is to find the decorative metal cover, which should be a hot and cold plastic inserted into the handle.
If you take out this decorative hot and cold cover, inside the handle there is a small screw. You have to use a 2.5 mm Allen key and turn the screw slowly anticlockwise.
You have to wobble the tap handle till it comes up. Watch out for the screw not to fall into the drain plug and accidentally lose it.
After you took off the handle from the tap stem, you have to take out the cartridge and replace it with a new one.
How to fix a mixer tap leaking spout
The o ring can leak because of the constant movement and turning of the spout. But this problem can be sorted out by changing the o rings at the bottom of the spout.
Here are the steps how you can fix a dripping tap spout:
The easy way to do this is by unscrewing the screw that is holding the spout in place. This grub screw can be found on the back of the tap. It is a tight space but it can be done with a small 2.5mm Allen key.
But if you cant manage to carry out the steps above, then follow these instructions:
Step 1: Using a box spanner you have to lose the hexagonal nut underneath the sink. Sometimes you can use an adjustable spanner too. Sometimes the nut is very tight. When you put back the nut do not over tighten.
Step 2: The next step is to turn the tap towards you and fin the grub screw. Remove the screw.
Step 3: You have to remove the spout to access the o ring.
Step 4: To take out the o ring you just need a flathead screwdriver, and slowly slide down the O-ring.
Step 5: Replace the O-rings and put back the spout.
Step 6: Put back the spout, align it with the marker that you can see on the spout. Insert the grub screw and tighten it up. Now you can tighten up the nuts below the sink.
Step 7: Check for leaks. Now can not have any more leaks.
Do you need help with your plumbing work?
If you think that this job is not for you then it is time to call a professional plumber.
Our fully qualified plumbers can fix your tap very easy.
Call us today and book your plumber

FAQs
Q. How much it cost to fix a dripping tap?
In London, the average cost is between £90- £130 plus materials.
Q. How do I stop my tap from dripping?
You can repair it yourself by changing the cartridge or call a professional plumber.
Q. What is the cause of a dripping tap?
The cause of a dripping tap is the constant use. The rubber seal or rubber washer will wear out and the metal will damage the tap seating.
Q. Will dripping taps get worse?
Well, it won’t get better with time. The rubber seal is worn out so it will be just worst.
Q. Is a dripping tap dangerous?
Not at all. If your tap leaking into the kitchen sink it is fine for a few days. Unless the water will go down to the floor what can cause major damages.
Q. Is a dripping tap an emergency?
We do not treat this work as an emergency. It can be an emergency if the water will causing damage.
Q. Can leak increase the water bill?
Yes. It is better to fix the leaks asap. Water drips can increase your bills.
Q. What materials should I buy?
You need to get yourself a replacement cartridge, replacement O ring/ rubber ring. Also assorted tap washer and two ceramic discs.
The post How to fix a dripping tap? appeared first on MML Plumbing Ltd.
from MML Plumbing Ltd https://ift.tt/3wrLofX
via IFTTT


No comments:
Post a Comment